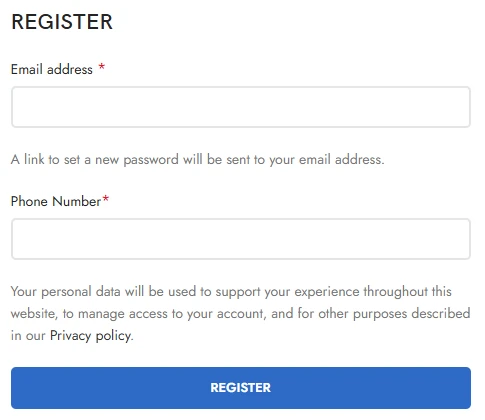
Customizing the WooCommerce registration form is a simple yet effective way to improve the user experience and boost your store’s potential.
By adding custom fields, you can gather essential details that help tailor your services to customer needs and build long-term relationships.
For example, adding a phone number field enables you to communicate directly with customers for order updates or special offers. Similarly, including a password field lets users set a secure password during signup, improving security and trust.
Custom fields also open the door to smarter marketing. By asking for additional information, such as preferences or demographics, you can personalize promotions and boost engagement.
For instance, adding extra fields like a birthday can allow you to send special offers on that date. These small details can significantly increase customer satisfaction.
In short, knowing how to add custom registration form fields in WooCommerce is not just about adding a few extra boxes. It’s about creating a seamless and personalized experience for your customers while optimizing your workflow.
Custom fields turn your registration form into a tool that works for both your business and your customers.
How to Add Custom Field in WooCommerce Registration Form (Step-by-Step)
In this section, you’ll learn how to customize your WooCommerce registration form by adding specific fields. We’ll start with how to add a phone number field, then cover how to add a password field, and finally explain how to add extra fields like a date of birth or other relevant details.
These steps will help you enhance the registration process for better user experience and data collection.
How to Add Phone Number Field in WooCommerce Registration Form?
Adding a phone number field is essential for better communication with your customers. Follow these steps to integrate it seamlessly:
- Open your WordPress dashboard.
- Navigate to your Child Theme and open functions.php file.
(Ensure you’ve backed up the file before making any changes.) - Add the following code snippet:
// Add phone number field to WooCommerce registration form
add_action('woocommerce_register_form', 'add_custom_phone_field');
function add_custom_phone_field() {
    ?>
    <p class="form-row form-row-wide">
        <label for="reg_phone">Phone Number<span class="required">*</span></label>
        <input type="tel" class="input-text" name="phone" id="reg_phone" value="<?php echo isset($_POST['phone']) ? esc_attr($_POST['phone']) : ''; ?>" required />
    </p>
    <?php
}

// Validate phone number input
add_action('woocommerce_register_post', 'validate_custom_phone_field', 10, 3);
function validate_custom_phone_field($username, $email, $validation_errors) {
    if (empty($_POST['phone'])) {
        $validation_errors->add('phone_error', __('Phone number is required!', 'woocommerce'));
    } elseif (!preg_match('/^[0-9]{10}$/', $_POST['phone'])) {
        $validation_errors->add('phone_error', __('Please enter a valid phone number.', 'woocommerce'));
    }
}

// Save phone number field
add_action('woocommerce_created_customer', 'save_custom_phone_field');
function save_custom_phone_field($customer_id) {
    if (isset($_POST['phone'])) {
        update_user_meta($customer_id, 'phone', sanitize_text_field($_POST['phone']));
    }
}
What the Code Does
add_custom_phone_field():
This function adds a phone number field to the WooCommerce registration form. It uses thewoocommerce_register_formhook to insert an input field with an ID ofreg_phone. The field is required, and any submitted value is preserved temporarily for better user experience if the form fails validation.validate_custom_phone_field():
This function ensures the phone number field is filled and properly formatted (e.g., 10 digits). If validation fails, it adds an error message that’s displayed to the user. This is achieved using thewoocommerce_register_posthook.save_custom_phone_field():
This function saves the validated phone number to the user’s metadata in WordPress. It usesupdate_user_meta()to store the data under the keyphone. This ensures the information is tied to the customer’s account.

Displaying the Phone Number in the Admin Panel
To enable administrators to view and edit the phone number field in the Users section of the WordPress admin panel:
- Open the
functions.phpfile of your theme. - Add this snippet:
// Add phone field to admin user profile page
add_action('show_user_profile', 'add_phone_field_to_admin_profile');
add_action('edit_user_profile', 'add_phone_field_to_admin_profile');

function add_phone_field_to_admin_profile($user) {
    ?>
    <h3>Additional Information</h3>
    <table class="form-table">
        <tr>
            <th><label for="phone">Phone Number</label></th>
            <td>
                <input type="tel" name="phone" id="phone" value="<?php echo esc_attr(get_user_meta($user->ID, 'phone', true)); ?>" class="regular-text" />
                <br><span class="description">Enter the user's phone number.</span>
            </td>
        </tr>
    </table>
    <?php
}

// Save phone field when admin updates user profile
add_action('personal_options_update', 'save_phone_field_in_admin');
add_action('edit_user_profile_update', 'save_phone_field_in_admin');

function save_phone_field_in_admin($user_id) {
    // Check if current user has permission to edit users
    if (!current_user_can('edit_user', $user_id)) {
        return false;
    }

    // Save the phone number
    if (isset($_POST['phone'])) {
        update_user_meta($user_id, 'phone', sanitize_text_field($_POST['phone']));
    }
}
What This Code Does
add_phone_field_to_admin_profile():
This function displays the phone number field in the admin user profile page. It retrieves the phone number stored inuser_metaand populates the input field with the current value. Admins can also enter or modify the value directly.save_phone_field_in_admin():This function saves any updates made by the admin to the user’s phone number. It checks if the current user has permission to edit the profile and securely updates the value in the database usingupdate_user_meta().

Display the Phone Number in the User Profile
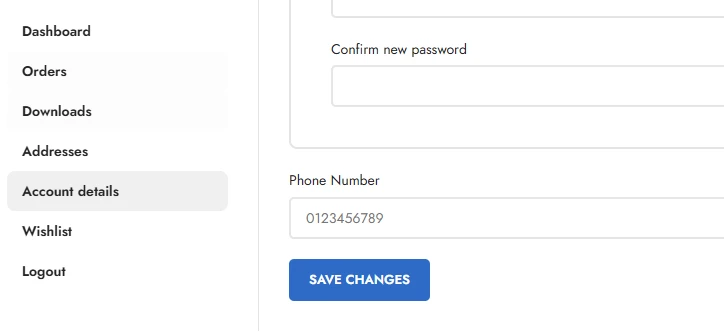
To show the phone number in the user’s account, you can add this snippet to your functions.php:
add_action('woocommerce_edit_account_form', 'add_phone_to_account_form');
function add_phone_to_account_form() {
    $user_id = get_current_user_id();
    $phone = get_user_meta($user_id, 'phone', true);
    ?>
    <p class="form-row form-row-wide">
        <label for="account_phone">Phone Number</label>
        <input type="tel" class="input-text" name="account_phone" id="account_phone" value="<?php echo esc_attr($phone); ?>" />
    </p>
    <?php
}
With the phone number field integrated, you now have a critical piece of customer information available. This can improve communication and help your business maintain better connections. Next, we’ll explore how to add a password field and extra fields like date of birth.
How to Add Password Field in WooCommerce Registration Form?
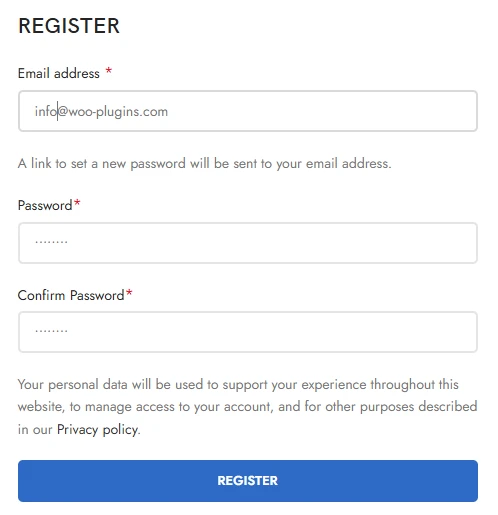
Adding a password field to your WooCommerce registration form allows users to set their password during the signup process, offering more control and improving user experience. Here’s how you can do it.
Adding a Password Field
To add a password field, you’ll need to modify your theme’s functions.php file. Follow these steps:
- Go to your Child Theme and open the
functions.phpfile. - Add the following code snippet at the end of the file:
// Add password fields to WooCommerce registration form
add_action('woocommerce_register_form', 'add_custom_password_fields');
function add_custom_password_fields() {
    ?>
    <p class="form-row form-row-wide">
        <label for="reg_password">Password<span class="required">*</span></label>
        <input type="password" class="input-text" name="password" id="reg_password" required />
    </p>
    <p class="form-row form-row-wide">
        <label for="reg_confirm_password">Confirm Password<span class="required">*</span></label>
        <input type="password" class="input-text" name="confirm_password" id="reg_confirm_password" required />
    </p>
    <?php
}

// Validate password fields
add_action('woocommerce_register_post', 'validate_custom_password_fields', 10, 3);
function validate_custom_password_fields($username, $email, $validation_errors) {
    if (empty($_POST['password'])) {
        $validation_errors->add('password_error', __('Password is required!', 'woocommerce'));
    } elseif (strlen($_POST['password']) < 8) {
        $validation_errors->add('password_error', __('Password must be at least 8 characters long.', 'woocommerce'));
    }
    if ($_POST['password'] !== $_POST['confirm_password']) {
        $validation_errors->add('password_error', __('Passwords do not match.', 'woocommerce'));
    }
}

// Save password during registration
add_action('woocommerce_created_customer', 'save_custom_password_field');
function save_custom_password_field($customer_id) {
    if (!empty($_POST['password'])) {
        wp_set_password($_POST['password'], $customer_id);
    }
}
What the Code Does
add_custom_password_fields():
This function adds two password fields—one for the password and one for confirming it—to the WooCommerce registration form. These fields are marked as required to ensure all users provide a password during signup.validate_custom_password_fields():
This function checks if:- The password field is filled.The password meets a minimum strength requirement (e.g., 8 characters).The password and confirmation password match.
save_custom_password_field():
This function securely saves the user’s password usingwp_set_password(). WooCommerce will automatically handle the login process with the saved credentials.

By allowing users to set their password during registration, you streamline the process and reduce confusion caused by auto-generated passwords. It also improves security since users can create strong passwords that they are familiar with.
You can use this method alongside other customizations to make the registration process more user-friendly and tailored to your store’s needs.
How to Add Extra Fields in WooCommerce Registration Form (Customizable)
Adding extra fields like address and date of birth can make your WooCommerce registration form more useful. But not all stores need the same fields, so it’s important to let you customize which fields are added, whether they’re required, and how they function.
Below is a breakdown with separate code blocks so you can pick and choose what to include.
Adding an Address Field
If you want to add an address field, use the following code:
// Add address field to WooCommerce registration form
add_action('woocommerce_register_form', 'add_address_field_to_registration');
function add_address_field_to_registration() {
    ?>
    <p class="form-row form-row-wide">
        <label for="reg_address">Address<span class="required">*</span></label>
        <input type="text" class="input-text" name="address" id="reg_address" value="<?php echo isset($_POST['address']) ? esc_attr($_POST['address']) : ''; ?>" />
    </p>
    <?php
}

// Validate the address field (optional)
add_action('woocommerce_register_post', 'validate_address_field', 10, 3);
function validate_address_field($username, $email, $validation_errors) {
    if (empty($_POST['address'])) {
        $validation_errors->add('address_error', __('Address is required!', 'woocommerce'));
    }
}

// Save the address field
add_action('woocommerce_created_customer', 'save_address_field');
function save_address_field($customer_id) {
    if (isset($_POST['address'])) {
        update_user_meta($customer_id, 'address', sanitize_text_field($_POST['address']));
    }
}
How to Customize:
- If you don’t want the address field to be required, remove the
<span class="required">*</span>in the label and the validation functionvalidate_address_field.
Adding a Date of Birth Field
If you want to include a date of birth field, use this code:
// Add date of birth field to WooCommerce registration form
add_action('woocommerce_register_form', 'add_dob_field_to_registration');
function add_dob_field_to_registration() {
    ?>
    <p class="form-row form-row-wide">
        <label for="reg_dob">Date of Birth<span class="required">*</span></label>
        <input type="date" class="input-text" name="dob" id="reg_dob" value="<?php echo isset($_POST['dob']) ? esc_attr($_POST['dob']) : ''; ?>" />
    </p>
    <?php
}

// Validate the date of birth field (optional)
add_action('woocommerce_register_post', 'validate_dob_field', 10, 3);
function validate_dob_field($username, $email, $validation_errors) {
    if (empty($_POST['dob'])) {
        $validation_errors->add('dob_error', __('Date of birth is required!', 'woocommerce'));
    }
}

// Save the date of birth field
add_action('woocommerce_created_customer', 'save_dob_field');
function save_dob_field($customer_id) {
    if (isset($_POST['dob'])) {
        update_user_meta($customer_id, 'dob', sanitize_text_field($_POST['dob']));
    }
}
How to Customize:
- If you don’t need the date of birth to be required, remove the
<span class="required">*</span>in the label and the validation functionvalidate_dob_field.
General Notes for Customization
- Add or Remove Fields:
To add other fields like company name, gender, or preferences, duplicate the code for one field and modify thenameandidattributes, labels, and validation accordingly. - Make Fields Optional:
If you don’t want a field to be required:- Remove the
validate_field functionassociated with that field. - Delete
<span class="required">*</span>from the label.
- Remove the
- Save Data to User Meta:
Ensure each field has a unique name andupdate_user_meta()key to avoid conflicts when saving data.
With this approach, you have full control over the extra fields in your WooCommerce registration form.
You can mix and match the fields, adjust validation rules, and make them optional or required based on your store’s needs. This flexibility ensures the form aligns perfectly with your goals.
Read more about: How to Edit Checkout Page in WooCommerce
Conclusion
Adding custom fields to your WooCommerce registration form is a practical way to collect essential customer information and enhance their experience.
Whether you need to know their phone number, allow them to set a password, or gather additional details like an address or date of birth, customizing the form gives you the flexibility to meet your business needs.
By understanding how to add custom fields in WooCommerce registration form, you can tailor the signup process without overwhelming users. Each field serves a purpose, whether it’s a phone number field to improve communication or password fields to let users set their credentials securely.
Ultimately, a well-designed registration form helps you connect with your customers better and drives your store’s growth.

